Auto-download [Kiwi]bank Transactions with Selenium
Intro
In an effort to better manage our finances I decided to ditch my self-written ASP.NET budgeting tool and adopt GnuCash, an excellent open source accounting application. As well as being a true double entry accounting system, one of the great things about GnuCash is its ability to import a set of transactions in various formats. The idea here is that you import an OFX or CSV from your bank and allocate transactions to various accounts.
After almost 4 years of manually entering every single transaction into my crappy home-grown tool I was on the verge of giving up altogether. I decided that whatever new system I went with would need to be as automated as possible. So partly for the challenge and partly because I’m efficient (lazy) – I decided to automate downloading of transaction files from my bank accounts at Kiwibank.
Now it would be really nice if KiwiBank provided a webservice API to pull these transactions down – of course that would be too good to be true. With an API ruled out that only leaves the front end.
The first option I looked at was a Python based web scraping tool called Scrapy. It’s a really flexible powerful tool for parsing html. As I started getting a grip on the syntax of Scrapy it became clear that it wasn’t going to do the job due to the JavaScript-heavy interface that Kiwibank uses.
The second option was browser automation. To me this seemed like a less elegant option but after finding Selenium I soon forgot about that. Selenium is a web testing and automation suit. It consists of a number of components including a pretty extensive set of development libraries and interfaces. The two tools I used were Selenium Server and Selenium IDE (Integrated Development Environment) for Firefox.
Selenium IDE
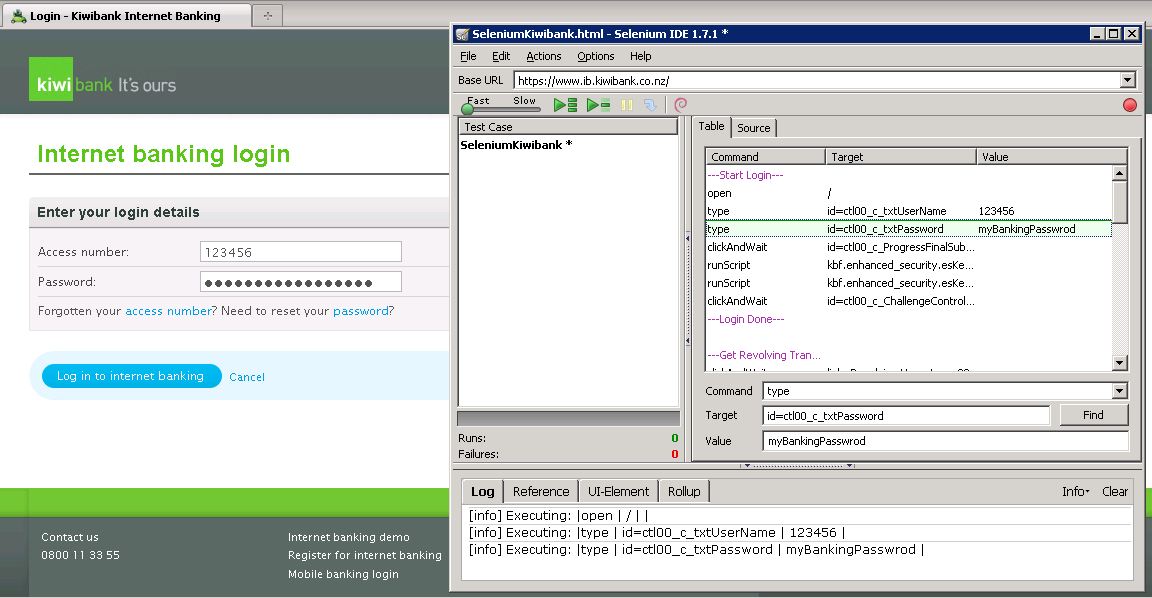
The Selenium IDE Firefox extension allows you to create, record, edit and test Selenium automation scripts.
Start off by creating a new test suit and then a new test case within that suite. Hit the record button and start recording your browser session. Every action you perform in the browser will be recorded as a step in the script. This will give you the basis for the automation. Once you’re done recording you might need to manually edit, add or remove some steps to make the script more robust, or fix bits that don’t play back correctly. You can play the script back with the buttons on the toolbar or you can execute one step at time by selecting the step and pressing ‘x’.
Another extremely useful tool to help analyze page elements is Firebug for Firefox, it’s an excellent compliment to the Selenium IDE.
Getting Creative with Kiwibank Security
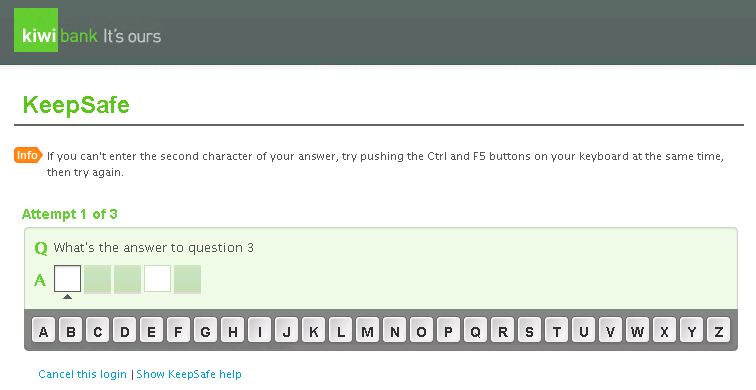
In an attempt to make their site more secure Kiwibank employ a two step authentication process. The first being AccessNo./Password and the second, a question/answer system which asks you to click the missing letters from the answer. This adds a slight level of security because it means an attacker needs to have a logger that’s a little more extensive than just logging keys.
Now it’s probably possible to get Selenium to read the question, work out which letters are missing and look up a table to determine which JavaScript should be called to complete the answer. And I may end up having to do that if Kiwibank reads this post! But fortunately for me Kiwibank allows you to set your own questions and answers. The questions all have to be different but the answers don’t. Simply setting all the answers to the same five letters means that I always call the same JavaScript.
To be honest it felt good the be the user, circumventing the security for a change!
Custom JavaScript
Selenium allows you specify a file with your own JavaScript functions. The file must be named user-extensions.js. It’s location can be configured in the IDE under options/options. I don’t think these scripts can interact with elements on the page though. Someone please correct me if I’m wrong here.
I created a custom JavaScript function that returned the current date less x number of days given as a parameter.
I used this function to get the last 28 days when specifying the “from date” on the export selector.
Auto-downloading Files & Firefox Profiles
The whole purpose of this exercise is to automate downloading of transaction files so we need to tell Firefox to automatically save files of a certain type instead of prompting. We’d also like to save them in a specific location.
The best way to handle this is create a custom Firefox profile for Selenium to use just for this automation. There’s a great post here which details the optimum profile settings for use with Selenium.
The last thing you’ll need to do to the profile is make sure that it handles your chosen export file type correctly. In my case I’m using .OFX so I needed to tell Firefox to always download .OFX files without prompting. This is done through the mimeTypes.rdf file in the profile. Details on this file here.
If you keep getting the add-ons popup every time you use the custom profile I found the following fix:
To disable add-ons window which appears every time when Selenium scripts are run on Custom Firefox Profile.
Close all instances of Firefox browser and delete the following files from the Custom Profile folder
extensions.cache
extensions.ini
extensions.rdf
compatibility.ini
This should reset Extension Manager and disable add-ons pop-up.
Selenium Server
Now with a fully working script and customFirefox profile in hand we can set about scheduling this automation with the Selenium server and the Windows task scheduler. The Selenium server would normally be stated and left running like any other server application. In our case we’ll just start it, run our script and then exit.
Once you get the command working at the command prompt you can then use it in a scheduled task running under it’s own user account. If you do this, everything will run in the background and you won’t see any windows pop up and it will run even if no one is logged on to the PC.
Here is the command I use to run my Kiwibank automation:
java -jar selenium-server.jar -singlewindow -htmlSuite "*firefox" "https://www.ib.kiwibank.co.nz" "D:\Selenium\Kiwibank\SeleniumSuitKiwibank.html" "D:\Selenium\Kiwibank\SeleniumSuitKiwibankResults.html" -firefoxProfileTemplate "D:\Selenium\FirefoxProfiles\Kiwibank" -userExtensions "D:\Selenium\JavaScript\user-extensions.js"
Notes about the command:
- Specify the test suite not the test case
- Specify a results file. (I haven’t need to look in it though)
- Specify the user extensions file if you have one
- Specify the location of your Firefox profile
That’s it. Fully automated transaction file download! Make sure you observe good security practices with this sort of stuff – Principle of Least Privilege.


