Create a Duplicate WordPress QA Site
Well it’s been a very busy week and I haven’t had much time for projects but I did throw together a script to duplicate my production WordPress instance so I have a place where I can test updates and changes before rolling them out to my blog. You will need shell access for this but most hosters seem to provide it these days.
First up I used my hosting control panel to create a new sub-domain and pointed it to a new directory. I also created a new blank MySQL database and a user account which had read access to my production WordPress database and full access to the new database.
I then created a “scripts” directory outside PublicHTML directory.
user@myhost.com[/]#cp /home/publicHTML/prodsite/wp-config.php /home/scripts/wp-config.php.qa
I copied wp-config.php from my production blog into the scripts folder.
user@myhost.com[/]#vi /home/scripts/wp-config.php.qa
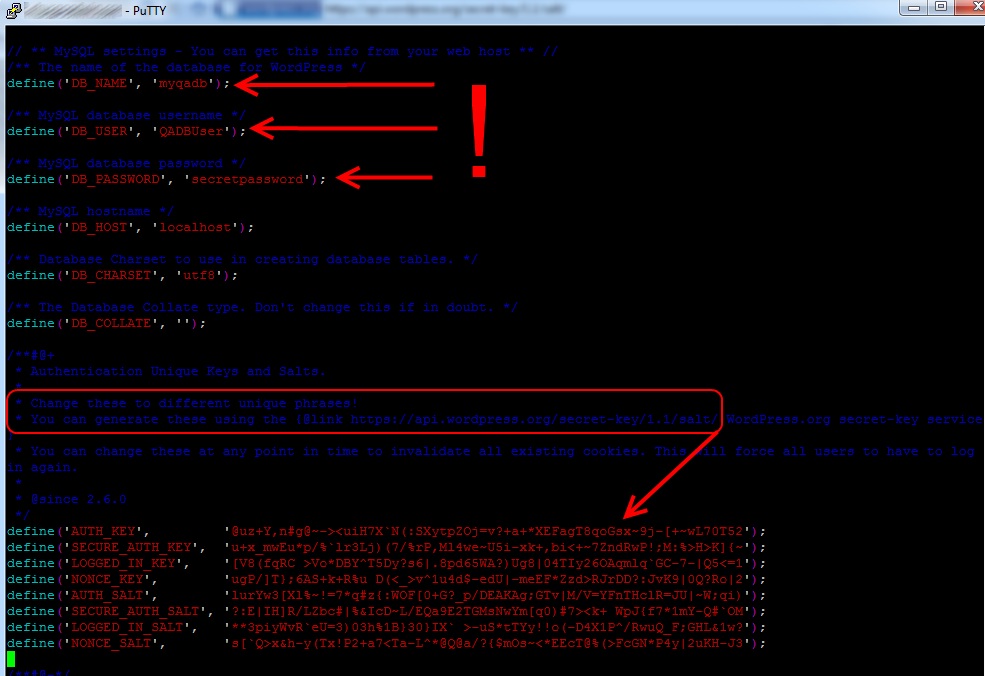
This file contains the WordPress database settings which I edited to point to the new database.
I didn’t want public access to my QA site and I certainly didn’t want Google to index it so again I used my hosting control panel to password protect the new directory. This just creates .htaccess file in the directory. I also copied this .htaccess to the scripts folder.
Now on to the script. This script “refreshes” the QA site. When the script is run everything in the QA site is wiped out and re-created as a duplicate of the production site. I used vi to create this script (refresh_QASite.sh) in my scripts directory. You can use whatever text editor your hoster provides. Set the permission on the script to 700 with chmod. This makes it executable and prevents others from reading it which is important because it contains passwords.
I’ll go over it line by line – it looks complicated but it’s really not. I’m not sure what your browser will do with wrapping and special characters so if you want to copy or paste bits you’re better to get it from the plain text version which will link at the bottom of the post.
#!/bin/bash
Standard first line of any bash script.
mysqldump --user=QADBUser --password=secretepassword --no-data --add-drop-table wpqadb | grep ^DROP | /usr/bin/mysql --user=QADBUser --password=secretepassword wpqadb
This line clears out all the tables in the database. This is handy because in a shared hosting environment you almost certainly won’t have permission to create and delete entire databases except though the web control panel. Make sure you type the correct database name as this will make short work of your production database! Thanks to Eddie for this great tip!
rm -rf /home/publicHTML/qasite
This wipes out the current QA Site directory. Again be careful to get the right path!
<span style="color: #ff0000;"><span style="color: #000000;"> </span></span>mysqldump --user=QADBUser --password=secretepassword wpdb | sed -e 's-blog\.rhysgoodwin\.com-blogqa.rhysgoodwin\.com-g' -e 's-/home/publicHTML/prodsite-/home/publicHTML/qasite-g' | mysql --user=QADBUser --password=secretepassword wpqadb
This dumps the MySQL production database though the “sed” command to replace the any urls and file paths. The output of sed is then piped back into the mysql command to populate the QA database.
cp /home/publicHTML/prodsite /home/publicHTML/qasite -r
Now that we have our QA database we need to make a copy of all the WordPress files and directories which is what this command does.
cp /home/scripts/wp-config.php.qa /home/publicHTML/qasite/wp-config.php
cp /home/scripts/.htaccess.qa /home/publicHTML/qasite/.htaccess
Because we wiped out the QA site directory and coped over it with the production files our QA site still has the production site wp-config.php which means it is pointing to the production database so we copy (and overwrite) the the wp-config.php with the one we prepared earlier in our scripts folder. We also copy over the .htaccess file which secures the QA site.
mysql  --user=QADBUser --password=secretepassword << eof
use wpqadb;
source /home/scripts/fixup.sql;
eof
Last of all I execute a “fixup.sql” file which changes the blog name so it’s obvious when I’m in the WordPress admin panel that I’m working on QA not production. This file could contain any number of customizations what you want to do on your QA site.
*UPDATE – Warning for Worpdress.com Stats/Jetpack Users*
It turns out that it’s a bad idea to have wordpress.com Stats running at 2 separate URLs. It can update your URL at wordpress.com with your QA URL. Not good.
I was too lazy to script disabling the Jetpack plugin so I just added another section to my fixup.sql which disables all plugins.
REPLACE INTO `wp_options` (`option_id`, `blog_id`, `option_name`, `option_value`, `autoload`) VALUES (2,0,'blogname','QA Weblog!','yes');

UPDATE wp_options SET option_value = '' WHERE option_name = 'active_plugins';
(Contents of fixup.sql)
That’s it! A fresh copy of blog when ever I need it, all with a single command.
This is based on WordPress but obviously it would apply to almost any site you would think of.
The key points are
- Appropriate find/replace across the entire database using sed
- Keeping a copy config file which points the application to the correct database
- Setting permissions on your script to 700 so it’s not world readable
- Making the QA site non-public so that Google won’t index it. Very important for SEO
- Making sure you’re very careful about database and path names when you are deleting files or dumping tables
Note for Mystique theme users
For some reason Mystique resets its theme settings after being copied to a different location. For the life of me I couldn’t figure out why. I don’t know how it knows after everything has been “find/replaced”! Anyway I worked around it by calling the site wget then re-inserting the settings into wp_options table in my fixup.sql file.
